Getting Started With Scribble Together on the Web
Who this is for: People using Scribble Together primarily on a web browser. We also have a guide for people using the iPad or iPhone app.
Creating Your First Board
To create your first whiteboard, click on the + icon in the upper right corner of your screen. Your blank canvas is ready for you to start scribbling. Test out the tools and have fun! You can always undo anything you scribble by clicking the ![]() . Clicking on the buttons in the tool tray will let you view and select tools like the marker
. Clicking on the buttons in the tool tray will let you view and select tools like the marker ![]() or bomb eraser
or bomb eraser ![]() as well as special tools like the blob
as well as special tools like the blob ![]() , and laser pointer
, and laser pointer ![]() .
.
Wondering where the “Save” button is? You don’t need one! As long as you’re online, your whiteboard auto-saves for you, so if you leave the site and return, you won’t lose a thing.
Sharing Your First Board
The first time you sign in or register on the web, you get a three day trial. After that period, you’ll need a Scribble Together Membership, which you can cancel any time.
(There are more options to try Scribble membership for free. When you sign up for a membership the first 14 or 30 days are free.)
While in the board you want to share, click the Add People icon
![]() in the upper right navigation bar. There are two ways for your guests to join your board:
in the upper right navigation bar. There are two ways for your guests to join your board:
Join with code
This is the most secure option, but it only works for immediate sharing, because your code will last only two hours. Share your 4-digit code with anyone you want to invite. You can read it aloud for immediate use, or type it in a chat as long as your guest will receive it quickly. From their iOS app, your guests will tap “Join board” on the All Boards screen and enter your 4-digit code. If using a web browser, they can visit scribbletogether.com/join, choose a display name, and enter the code there. The display name will be shown to you, the board owner, so that you can give permission to join. Click on the “Accept” button to allow your guest to join. This step keeps your whiteboard secure.
Join with link
Your share link will not change or expire, so you can email it or message it anywhere you like. First, click on the “Make a shareable link” box on in the Add People menu. Then click on “Copy link to clipboard” and send the link to your guests. Your guests will then click on your scribbletogether.com link. If they tap the link on an iOS device with Scribble Together installed, it will open to the right board. If they don’t have the app, your link will open in their browser.
Now your guests will be able to see what you’re scribbling: LIVE!
Using Your Board With a Call (Zoom, Google Hangouts, FaceTime, webinar, cellular, rotary phone…)
We are always amazed by the new ways users like you are making the most of Scribble Together. Whether you are a teacher, tutor, architect, project manager, coder, student, designer, artist, or just having fun with friends, we’ve got you.
Zoom: The best approach is to use Zoom and Scribble Together independently. First, get connected on your Zoom call, then open Scribble Together in a separate window in your web browser. Everyone can connect on the same whiteboard while on Zoom by just reading your code out loud, or by copy/pasting the link into the Zoom chat.
Google Meet: On a Google Meet, the best approach is to use Meet and Scribble Together independently. First, get connected in your Hangout, then open Scribble Together in a separate window in your web browser. Everyone can connect on the same whiteboard while in your Meet by just reading your code out loud, or by copy/pasting the link into the chat.
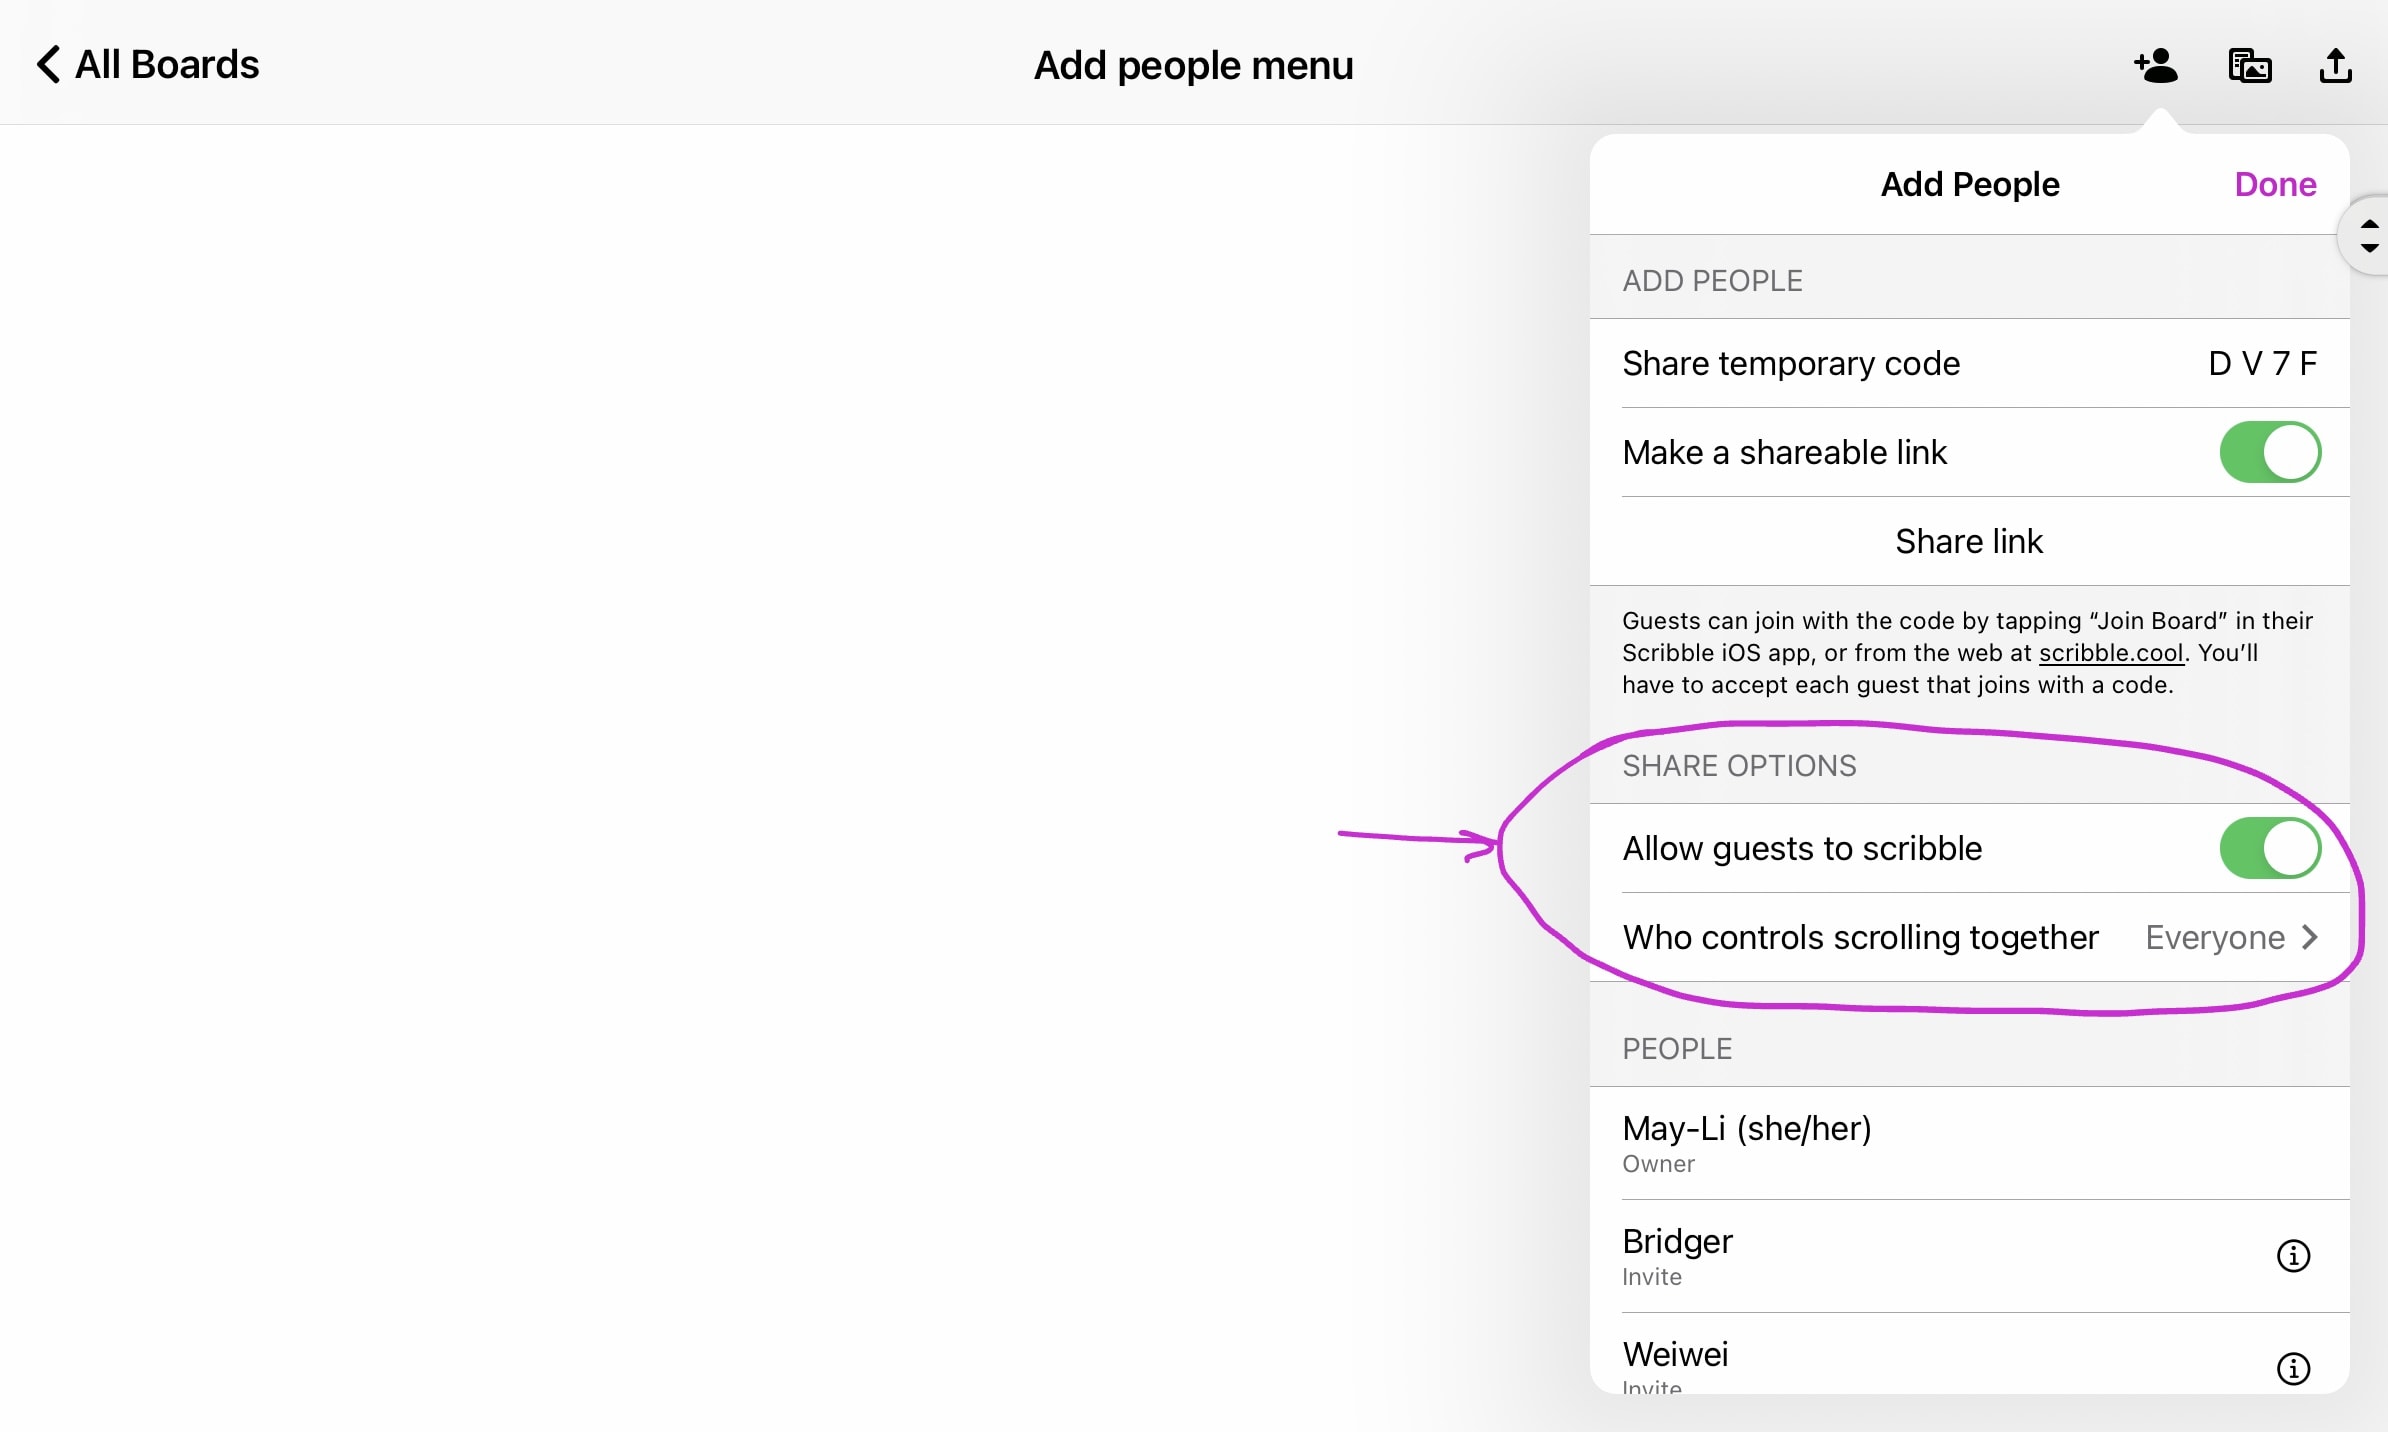
Controlling Who Can Edit
Click on the Add People ![]() icon in the upper right side of your board to open the Add People menu. In the “Share Options” section, click the “Allow guests to scribble” box.
icon in the upper right side of your board to open the Add People menu. In the “Share Options” section, click the “Allow guests to scribble” box.
Allowing people to Edit lets them use the drawing tools and allows them to upload files to draw on.
Guest editing can be temporary, so if you want to remove your guests ability to edit, unclick the “Allow guests to scribble” box.
Working with PDFs and Images
You can upload any image or PDF (think: homework or other collaborative creative projects) to a Sheet or board and scribble together on them!
- Click on the icon in the top right menu bar to upload an image or PDF

Each time you add an image or PDF, you will be adding a new Sheet to your Main Sheet. You can upload worksheets for a whole class in advance of a lesson, or many images to review. Why not throw a selfie in there too? ;)
Deleting a Whiteboard
Sometimes a board just has to go…
To delete a board, first navigate to your All Boards screen. Click “Edit” in the top right of your screen, When in edit mode, the thumbnails will have a small “x” appear in the corner of each board. Tap the x on the board you want to delete.
To irreversibly delete your board, click on “Delete.” If you have second thoughts, tap “Cancel.”
When you are finished, click “Done” in the the top right corner of the screen to leave edit mode.