Getting Started with Scribble Together on iPad and iPhone
Who this is for: This guide is for people using the iPad or iPhone app. We also have a guide for people using the web.
Creating Your First Board
To create your first whiteboard, tap the + icon in the upper right corner of your iOS device. Your blank canvas is ready for you to start scribbling. Test out the tools and have fun! You can always undo anything you scribble by tapping the ![]() . Tapping the buttons in the tool tray will let you view and select tools like the marker
. Tapping the buttons in the tool tray will let you view and select tools like the marker ![]() or bomb eraser
or bomb eraser ![]() as well as special tools like the blob
as well as special tools like the blob ![]() , laser pointer
, laser pointer ![]() , and lasso
, and lasso ![]() .
.
Wondering where the “Save” button is? You don’t need one! Your whiteboard auto-saves for you, so if you leave the app and return, you won’t lose a thing.
Sharing Your First Board
If it’s been less than 24 hours since you downloaded the iOS app, you can share your board with guests free of charge. After 24 hours, you’ll need a Scribble Together Membership, which you can cancel any time.
(There are more ways to try Scribble for free! The first time you sign in via our website, you’ll get an additional three days for free. And when you’re ready to join us at a membership level, the first 14 or 30 days (monthly vs annual membership) are free.)
To get started, while in the board you want to share, tap the Add People icon ![]() in the upper right navigation bar. There are two ways for your guests to join your board:
in the upper right navigation bar. There are two ways for your guests to join your board:
Join with code
This is the most secure option, but it only works for immediate sharing, as your authentication code will last only two hours. Share your 4-digit code with anyone you want to invite. You can read it aloud for immediate use, or type it in a chat as long as your guest will receive it quickly. From their iOS app, your guests will tap “Join board” on the All Boards screen and enter your 4-digit code. If using a web browser, they can visit scribbletogether.com/join, choose a display name, and enter the code there. The display name will be shown to you, the board owner, so that you can give permission to join. Tap the “Accept” button to allow your guest to join. This step keeps your whiteboard secure.
Join with link
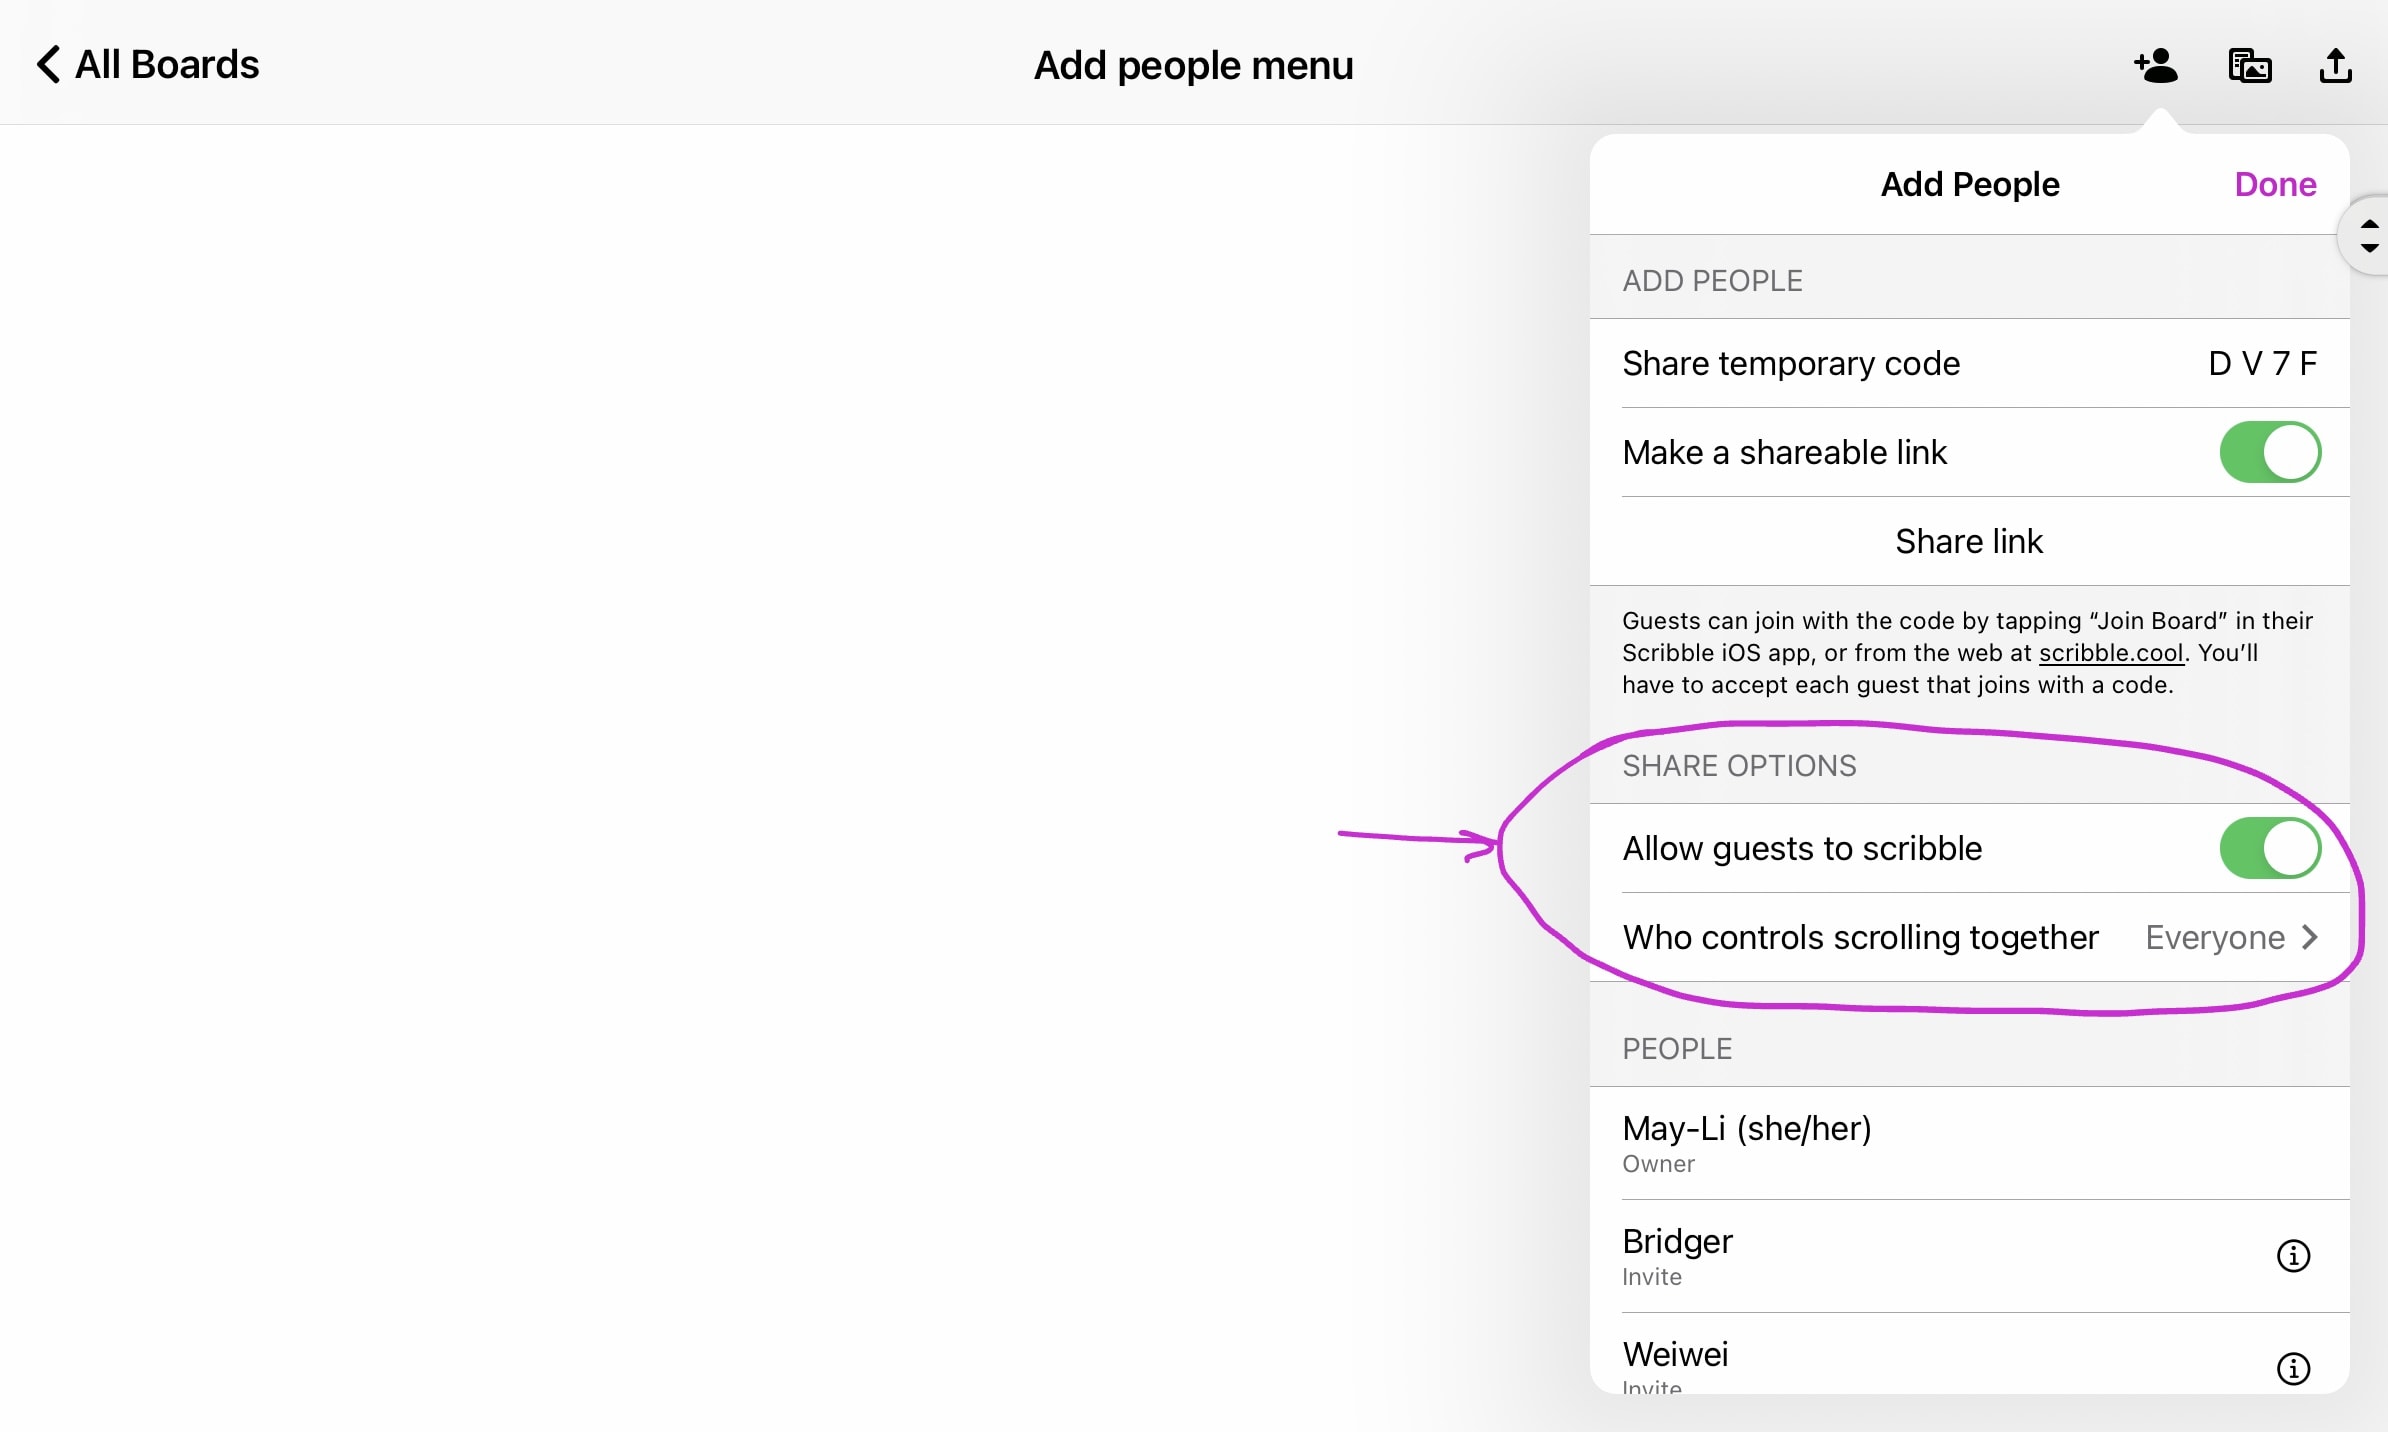
Your link will not change or expire, so you can email it or message it anywhere and anytime you like. Just remember anyone with this link may join your board. First, turn the “Make a shareable link” switch on in the Add People menu. Then tap “Share link” to bring up the standard iOS share menu and send the link to your guests. Your guests will then tap your scribbletogether.com link. If they tap the link on an iOS device with Scribble Together installed, it will open to the right board. If they don’t have the app, your link will open in their browser.
Now your guests will be able to see what you’re scribbling: LIVE! Scrolling on iOS apps is default synchronized, and your guests won’t have permission to scribble with you. If you’d like to change the default settings, skip ahead to Using Your Board with a Call.
Using Your Board With a Call (Zoom, Google Hangouts, FaceTime, webinar, cellular, rotary phone…)
We are always amazed by the new ways users like you are making the most of Scribble Together. Whether you are a teacher, tutor, architect, project manager, coder, student, designer, artist, or just having fun with friends, we’ve got you.
Zoom: First, get connected on your Zoom call, then open Scribble Together on your iOS device. Everyone can connect on the same whiteboard while on Zoom by just reading your code out loud, or by copy/pasting the link into the Zoom chat.
Google Meet: First, get connected in your Hangout, then open Scribble Together on your iOS device. Everyone can connect on the same whiteboard while in your Meet by just reading your code out loud, or by copy/pasting the link into the chat.
FaceTime: iPad supports a “picture in picture” mode, so your video will stay open while you are in other apps, like Scribble Together, allowing you to show your face and your board at the same time. To learn more details about which iPad models are supported, check out imore.com.
Controlling Who Can Edit
Tap the Add People ![]() icon in the upper right side of your board to open the Add People menu. In the “Share Options” section, swipe the “Allow guests to scribble” switch to on.
icon in the upper right side of your board to open the Add People menu. In the “Share Options” section, swipe the “Allow guests to scribble” switch to on.
Allowing people to Edit lets them use the drawing tools and allows them to upload files to draw on.
Guest editing can be temporary, so if you want to remove your guests ability to edit, flip the “Allow guests to scribble” switch back.
Controlling Who Can Scroll
By default, you and your guests are scrolling together: if one person scrolls, everyone scrolls. If one person switches to a new Sheet in your whiteboard, you’ll switch Sheets too. You naturally see the same parts of the board during your conversation.
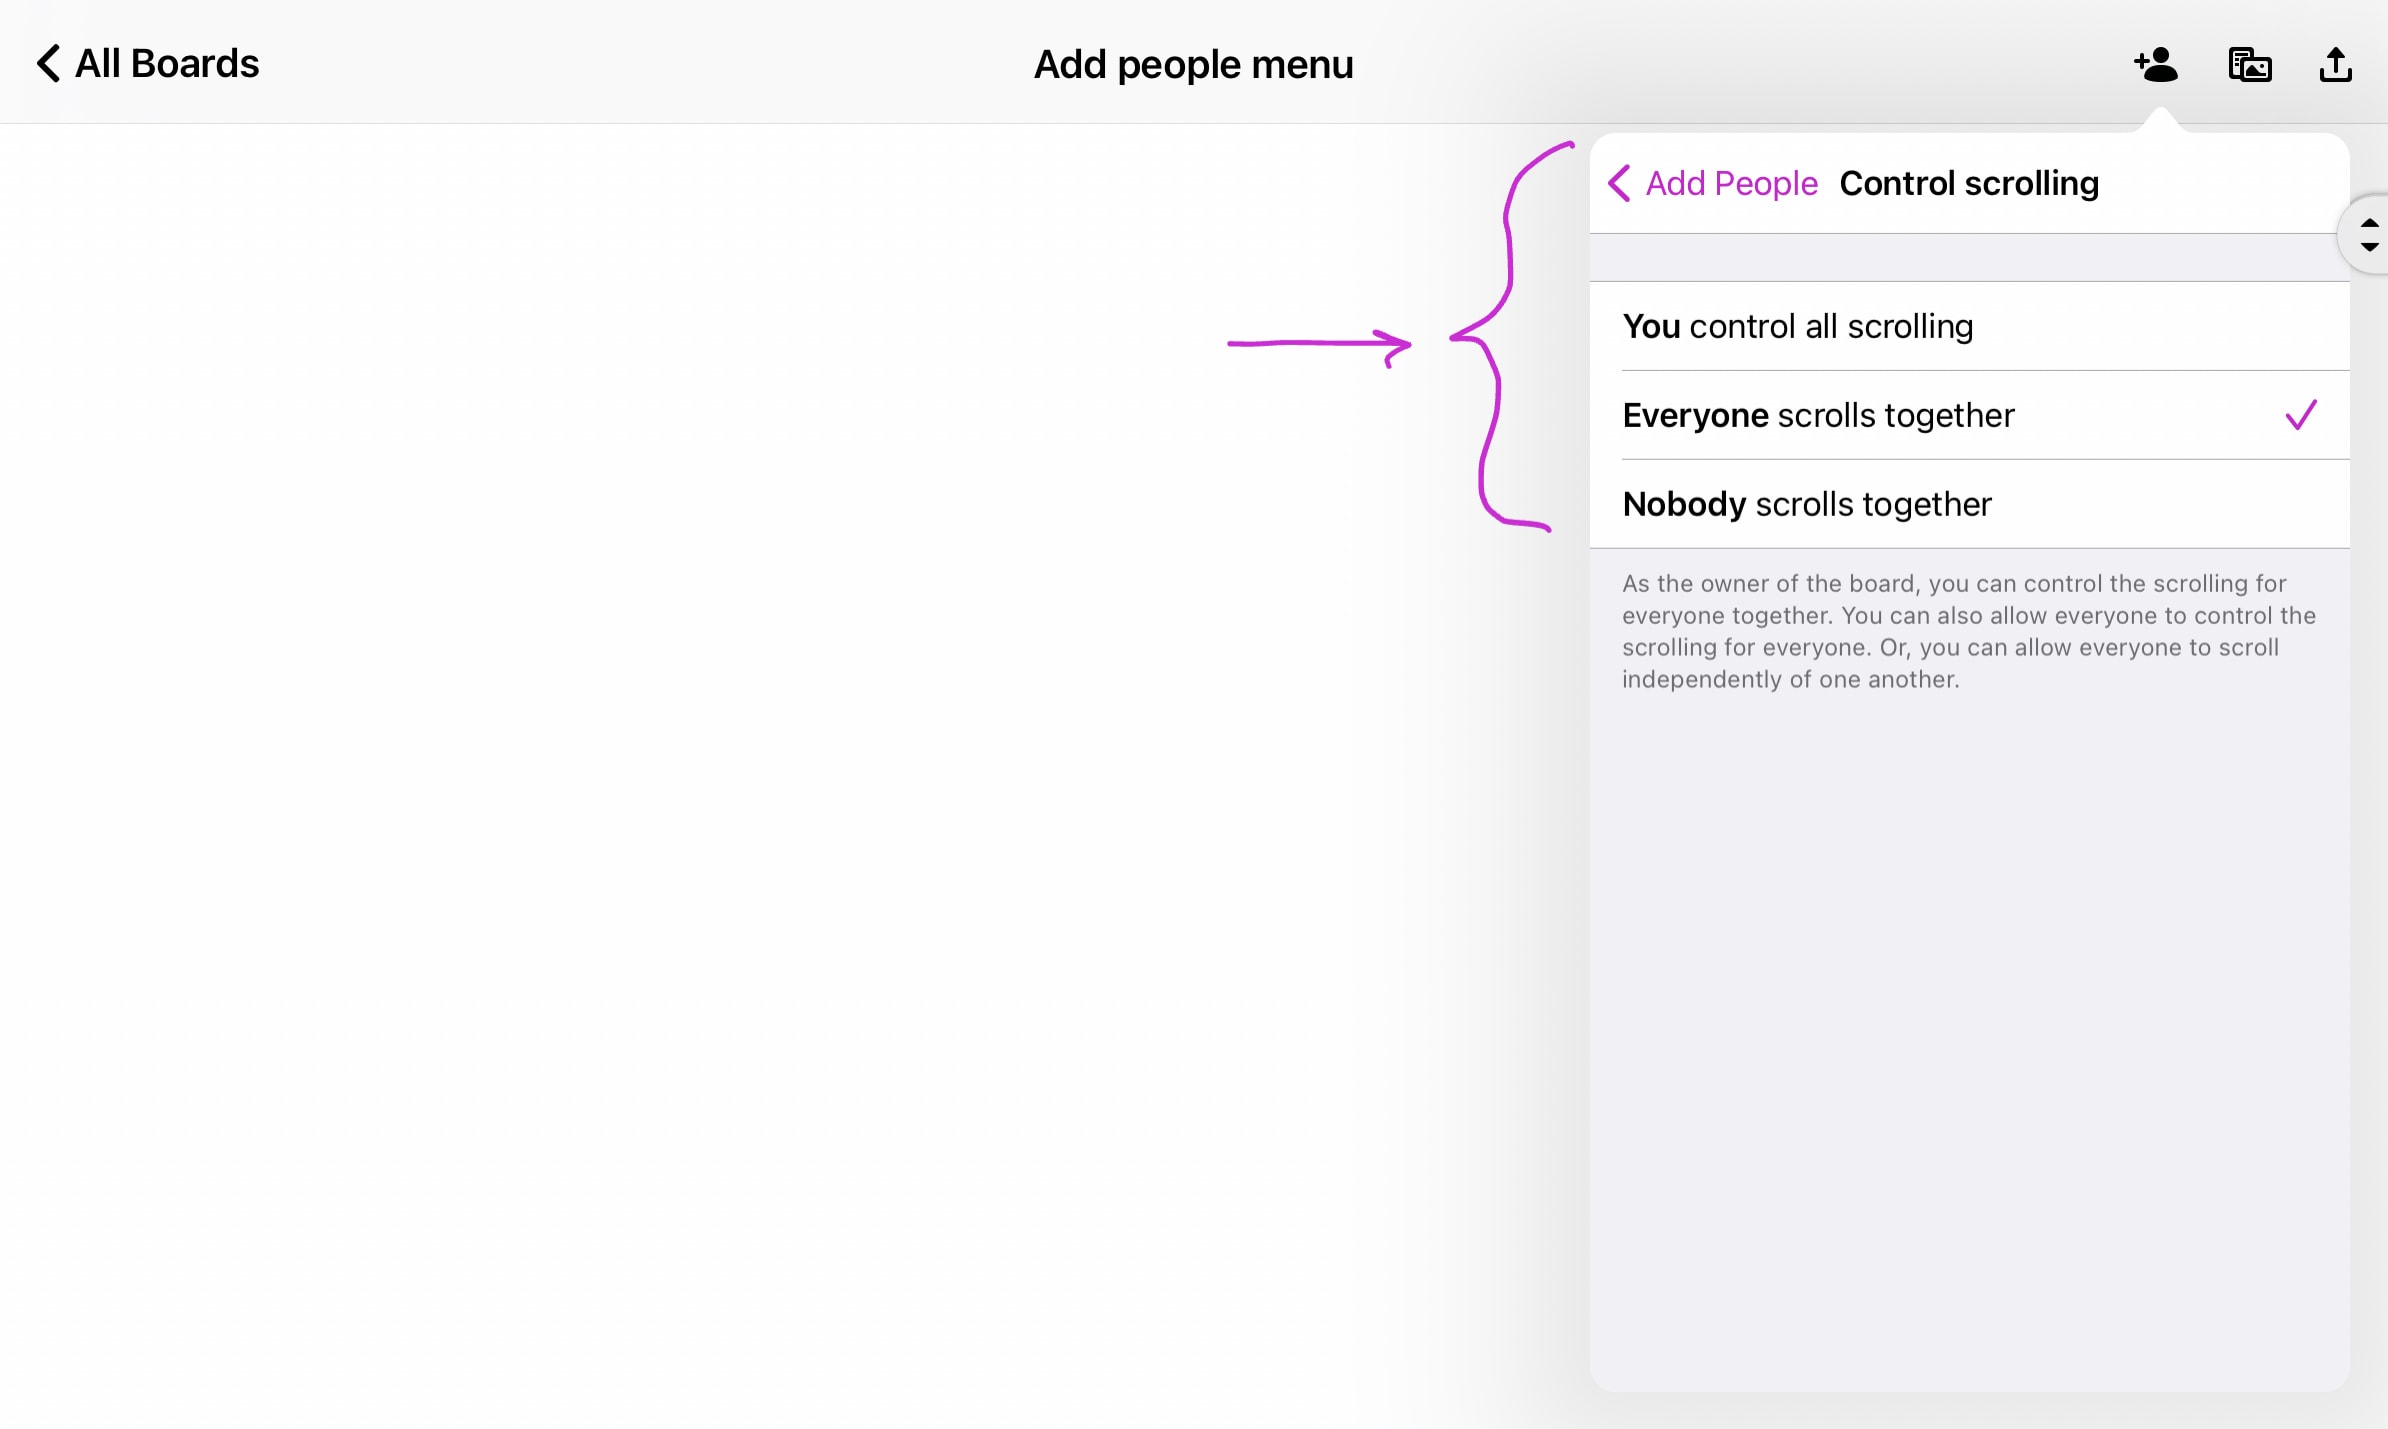
To adjust scrolling and Sheet switching capabilities, Tap the Add People ![]() icon in the upper right side of your board. Under “Share Options” tap “Who controls scrolling together.” There are three options:
icon in the upper right side of your board. Under “Share Options” tap “Who controls scrolling together.” There are three options:
- Everyone scrolls together (default). This is great if you’re working directly with your guests on the same material. It makes sense for small groups of 2-4 people.
- You control all scrolling. This is useful when you want your guests to follow along with what you are doing, but you don’t want them to move the canvas themselves.
- Nobody scrolls together. This allows you and your guests to move around your board freely and independently, which is great if you want to allocate separate parts of the canvas or sheets for group work during breakout sessions. For instance, if you are teaching or leading a Scribble session, you can then move around the canvas or sheets and see the group work happening live.
Working with PDFs and Images
You can upload any image or PDF (think: homework or other collaborative creative projects) to a Sheet or board and scribble together on them!
-
Tap the
 icon in the top right menu bar. Now you can choose between:
 - Take photo
- Choose photo from library
- Choose file
- Add blank sheet
Each time you choose a new option, you will be adding a new Sheet to your whiteboard. You can upload worksheets for a whole class in advance of a lesson, or many images to review.
Deleting a Sheet From Your Whiteboard
You can delete individual Sheets from your whiteboard without needing to delete the entire board. To delete, tap the ![]() icon in the top right menu bar to view all the Sheets in your whiteboard. Tap and hold on the Sheet you want to delete, and choose “Delete Sheet”.
icon in the top right menu bar to view all the Sheets in your whiteboard. Tap and hold on the Sheet you want to delete, and choose “Delete Sheet”.
Renaming a Board
There are two ways to rename your board:
- From the All Boards screen exit your whiteboard by tapping the < on the upper left of your screen. You will see your boards default to names based on the date you created them, with small thumbnail images. To change your board’s name, tap directly on the name and an edit box will open, allowing you to rename it.
- From within the board (iPad only) tap in the top area of the navigation bar. If there isn’t a navigation bar present, then tap the top center of the page to get it to show, and then tap the text and hit “rename”.
Deleting a Whiteboard
Sometimes a board just has to go…
To delete a board, first navigate to your All Boards screen. Tap and hold the thumbnail of your board until the thumbnails hover and a small “x” appears in the corner of each board. Tap the x on the board you want to delete.
To irreversibly delete your board, tap “Delete.” If you have second thoughts, tap “Cancel.”